|
|
|
||
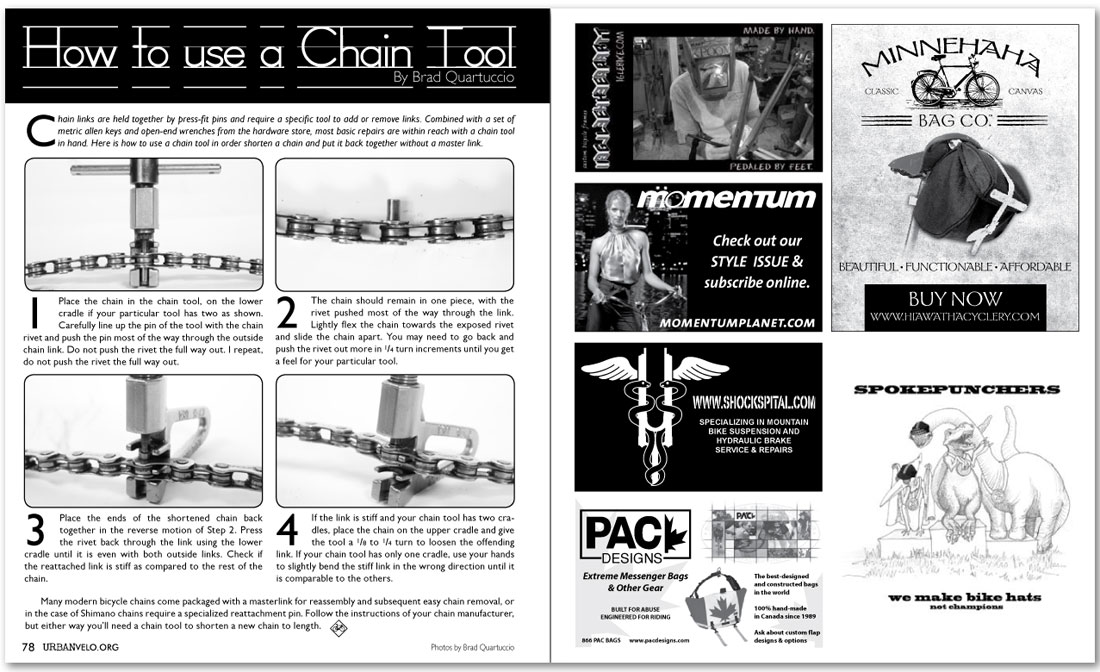
How to use a Chain ToolChain links are held together by press-fit pins and require a specific tool to add or remove links. Combined with a set of metric allen keys and open-end wrenches from the hardware store, most basic repairs are within reach with a chain tool in hand. Here is how to use a chain tool in order shorten a chain and put it back together without a master link. 1 Place the chain in the chain tool, on the lower cradle if your particular tool has two as shown. Carefully line up the pin of the tool with the chain rivet and push the pin most of the way through the outside chain link. Do not push the rivet the full way out. I repeat, do not push the rivet the full way out. 2 The chain should remain in one piece, with the rivet pushed most of the way through the link. Lightly flex the chain towards the exposed rivet and slide the chain apart. You may need to go back and push the rivet out more in 1/4 turn increments until you get a feel for your particular tool. 3 Place the ends of the shortened chain back together in the reverse motion of Step 2. Press the rivet back through the link using the lower cradle until it is even with both outside links. Check if the reattached link is stiff as compared to the rest of the chain. 4 If the link is stiff and your chain tool has two cradles, place the chain on the upper cradle and give the tool a 1/8 to 1/4 turn to loosen the offending link. If your chain tool has only one cradle, use your hands to slightly bend the stiff link in the wrong direction until it is comparable to the others. |
|
|